How to efficiently manage high-demand activities by transitioning waitlisted participants into open spots as they become available each term
Step 1 - Locating and Selecting the Waitlisted Client
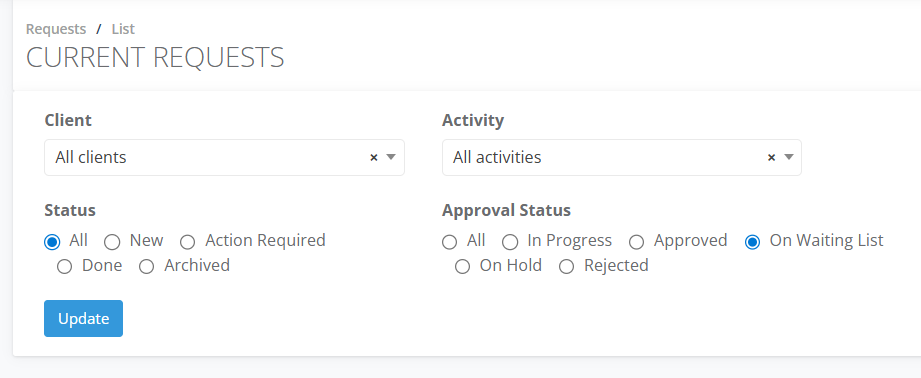
From the Frontdesk, go to Requests and select Current.
Filter by Approval Status > On Waiting List
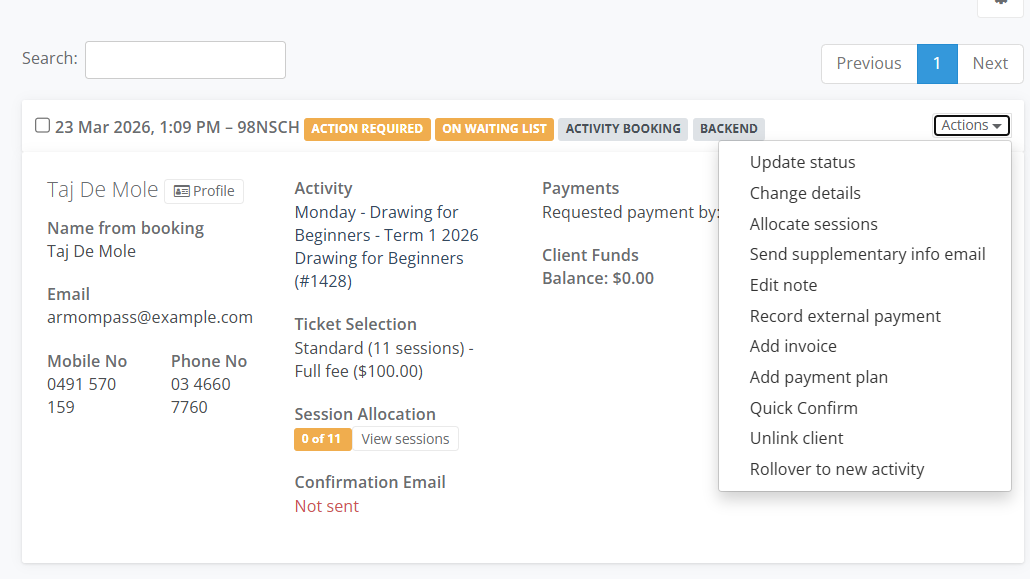
On the Client Tile go to Actions and select Change Details
In the Change Requests Details window in the Booking Type select Booking. Choose the Ticket eg. Full Fee and Save

Step 2 - Processing Payment
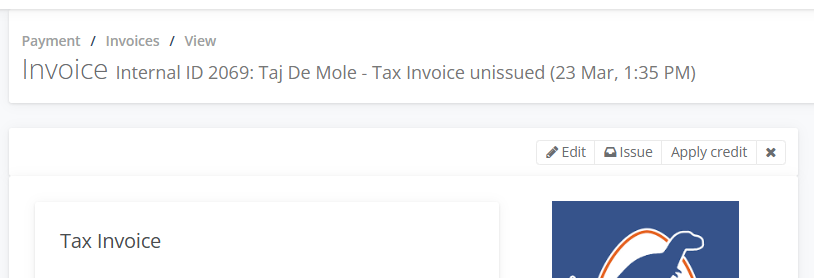
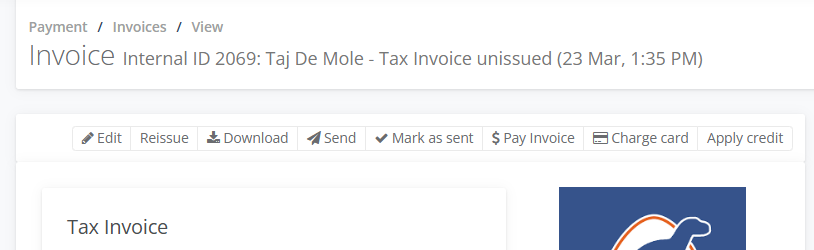
To create an invoice for payment. Select on Actions and Add Invoice
 5. Choose the Payment Type eg Credit Card - online and select Add
 6. Select on the Invoice, move your cursor and click on Tax Invoice unissued
 7. Issue the invoice
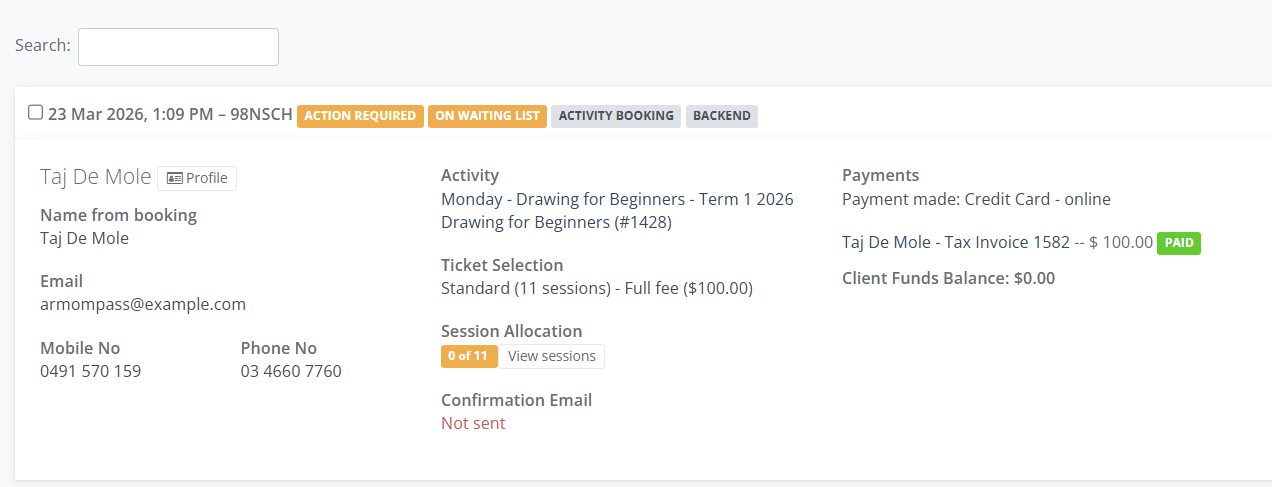
8. Select on Charge Card for credit card or Pay Invoice for other payment types.
9. For Credit Card, enter their card details and select Charge 10. Once Paid, select on the back arrow of your browser. Go back to Activity Summary > Request
Step 3 - Finalizing Approval and Attendance
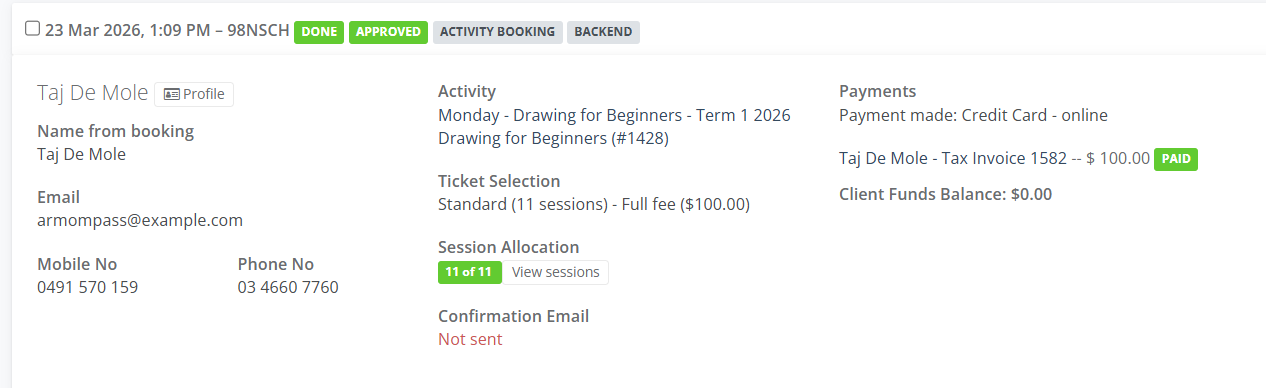
11. In Session Allocation, select on View Sessions eg. 0 of 11 and allocate to all the Sessions so they are assigned to the Attendance Sheet.
12. Change the On Waiting List label. In the Client tile, Go to Actions select Update Status and change to Approved and Done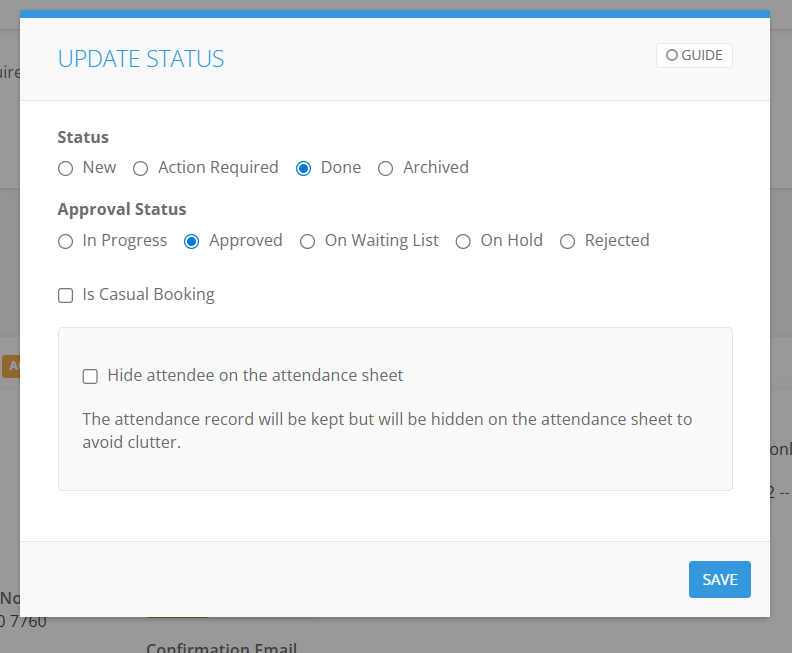
13. The Client has been assigned.